

It’s finally here! The first of (hopefully many) room reveals. You may be thinking – didn’t you move like 10 months ago, and yes, you would be correct. But things move a bit slower here at the Cottage (the previous owners called it that so I’m continuing the tradition) so each room is coming together at a more gradual pace. It feels nice to have actually lived in the home for a while and to figure out what will work for us in each room.

Which brings me to the home office / guest bedroom – the first space that we tackled and indeed the first room we slept in on a mattress on the floor while we figured out the gameplan.

Here’s what it looked like on day one. Well, let’s say week one since this was after a significant amount of cleaning. The house (built sometime in the 1830s-1850s) was unoccupied for a bit before we took ownership, so there was a fair amount of cleaning and bug relocation we had to attend to before we could make it cozy.

Our first step was sanding these very very orangey floorboards down (installed sometime in the 1970s) and revealing the natural color underneath. We rented a floor sander from Home Depot and spent the better part of a weekend getting all of the layers off. We then opted to put a matte seal over the wood without applying a stain, and I love the way it came together. The wood has plenty of character (ie scratches and marks) but I think it fits the rest of the house so much better. For enquiring minds, we used ZAR Poly Ultra Tough Finish in Matte.


The next step was bringing a bit more charm to the space by adding vertical boards (is it called shiplap if it’s vertical?) to the walls and beadboard to the ceiling. It wasn’t a completely necessary thing to do, and was ultimately a style decision to help reflect the age of the home better. This room would have originally had a sloped ceiling, and was bumped out to make a full bedroom sometime in the past 150 years, so it just had drywall and some windows from the 90s and not a whole lot of character.

We knew we would be replacing the windows eventually owing to the condition they were in, but with the panels up, the room started to feel a bit more cottage-y, and closer to the vision I had for the space. Once the windows went in (we opted for Pella casement style windows) the room was starting to feel really quite cozy.

And as a note for the following photos, the color may be just a bit green, and that’s owing to Spring arriving and turning the entire exterior of our home green. I’m still trying to work through how to shoot spaces and avoid the green hue it gives each picture, but I’m new to it and struggling a bit. Any photographers with tips, please let me know, feeling a bit clueless here!


So the biggest goal with this room was to have it be multifunctional – to serve equally as an office, a dressing room, and as a guest bedroom when needed. We’ve never had a guest bedroom before as our last home didn’t have enough space for one, so it feels like such a luxury to be able to have friends and family stay over, and we wanted to make it as comfortable as possible.
My desk is an antique find (my Christmas gift from Eric) and sort of set the tone for the rest of the furniture. During the day the top folds down to reveal my laptop and planner, and at night it closes up and transforms into a dresser. Perfect for signaling the end of the work day and easy for guests to use when staying.


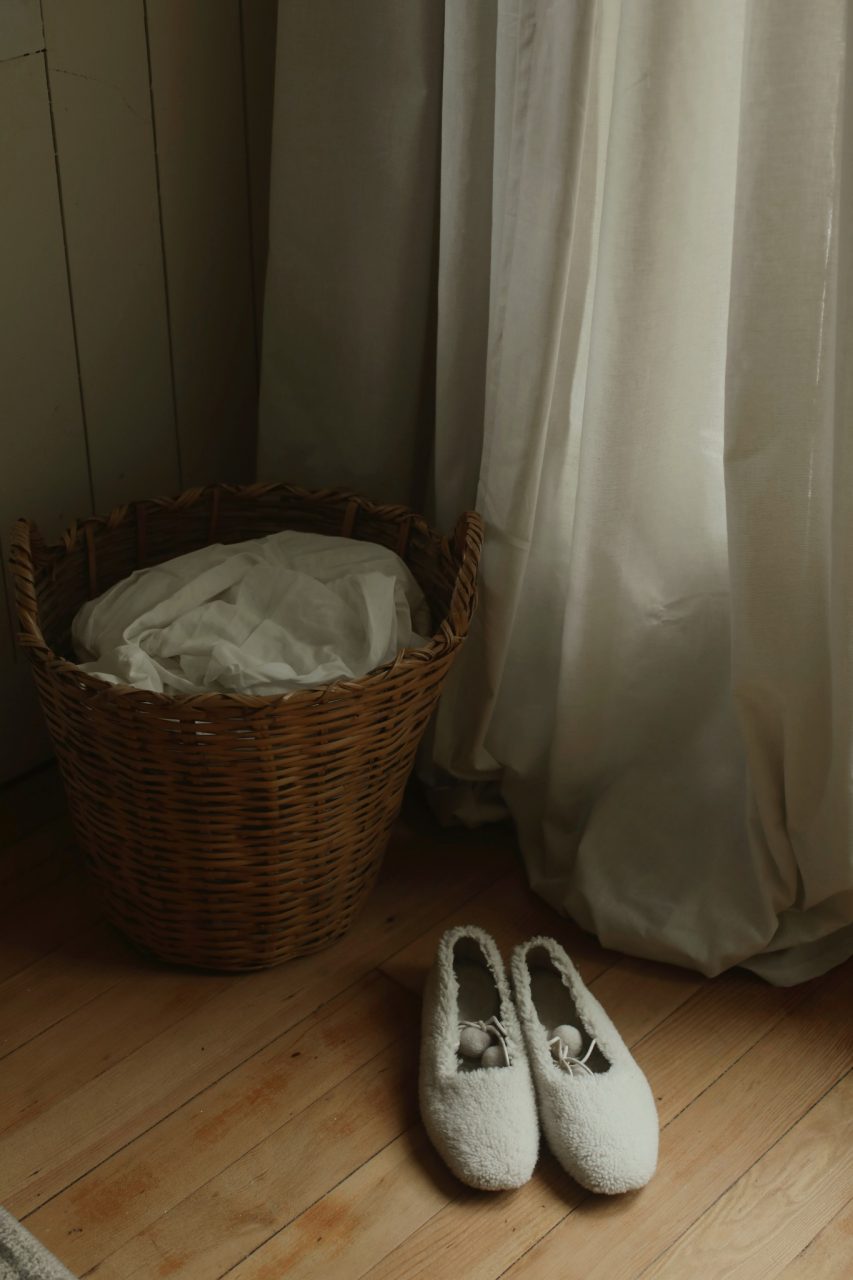
Keeping the floor plan open was also a consideration and given that the room is on the smaller side, it meant choosing smaller pieces to decorate with. A small milking stool next to the large mirror provides a home for candles and books, and the opposite corner is home to laundry basket or chair, depending upon the set-up.

Choosing a bed took a bit longer. We debated a twin sized bed to keep the floorpan clear, but ultimately it limited how many guests could stay over. Once we landed on a day bed, we narrowed it down to this one here mostly because of how large it could become, nearly a king size when folded out. Perfect for guests to actually get a good night’s sleep, and an option that will work for visiting friends and parents alike.

I actually reached out to Brentwood Home to find the right mattresses for the daybed, and was thrilled when I found that they had something that would work. I first discovered their brand through their pillows (the charcoal activated body pillow is what I sleep with every night and nothing compares) so I knew their mattresses would be just as great of quality without being a major splurge. They have such beautiful attention to detail with each of their mattresses while still being affordable, and that was key since we needed two to complete the day bed. Plus they make a thinner mattress for just such a set-up, as the daybed couldn’t accommodate a standard depth mattress.
I was nervous that a thinner mattress would feel just like that – thin – but I was so wrong. Eric and I ended up taking a nap on the bed the very day they arrived and it felt just as comfortable as a standard mattress and perfect for adults and kids alike.


When folded out, the bed has just the most beautiful view of the trees around and it feels just a little like sleeping in a treehouse. I love the way it’s all come together, and a part of me will always wonder if maybe we should have kept this room as our primary bedroom? Too late now, but I’m glad to have a room for our guests to enjoy.


Room Details :
- Paint : Pearly Cotton from Magnolia
- Bed Frame
- Mattresses *
- Throw Pillows
- Lumbar Pillow
- Curtains
- Rug
- Chair
- Luggage
- Oak Candle (use Courtney15 for a discount)
* mattresses very kindly gifted by BrentwoodHome – all opinions expressed are my own.
5 Comments
-
pastoralesque
-
July 05, 2022
I love it! Simple, full of character, it’s clear you are working patiently to let the house tell you what it needs. As for the greenish photos— I’m not a professional photographer, just a fellow film photography lover and interior design lover, and as such I really appreciate that your photos here are true to life. Paint colors change with the seasons! Real rooms aren’t static swatches. That green cast actually attracted me to your color choice as I’m trying to pick a warm white for my living room that will look good when my front yard turns the whole room green too. It’s kind of like getting a bonus color without having to repaint.
-
Courtney Halverson
-
July 12, 2022
I love this! That’s such a beautiful way to look at things, that the room color will change seasonally and to embrace it!
-
Megan Ambrosini
-
September 06, 2023
Hi Courtney! Hope you’re doing well. We are considering getting this exact set up for our guest room which also serves as my husbands home office. We have a baby boy on the way so we will have lots of visitors. Would you say the crease between the two mattresses is problematic at all? Your input is really helpful. Thank you!
-
Bee
-
October 12, 2023
Hi Courtney! This is one of my favorite spaces you’ve done, your whole home is really just so lovely 🙂 I want to redo my guest bedroom to make it more usable for me, since we don’t actually get guests all that often. What’s the feedback you’ve gotten on the daybed/mattresses? Guests are primarily parents in their 50s/60s and I don’t want to hurt anyone, haha. Thank you so much! Hope you’re enjoying the changing seasons.


Erin
July 05, 2022
So beautiful! I would love to have a guest space in our next home, and the daybed is brilliant. To follow-up on your question about the green hue – if you’re shooting in raw and editing in Lightroom, you should be able to fix this by desaturating the yellow in the HSL functions (green often plays as yellow in photos). If that doesn’t work or doesn’t have as much impact as you like, maybe try adjusting the overall tint slightly toward the magenta side or even playing with the hue of the greens and yellows. Hope that helps!