

Finally, after months of hinting, we are sharing the room reveal for our living room! But first, let’s take a look at how this space has evolved.
When we first moved in, this space looked SO different. An addition tacked onto our 1920s home sometime in the 80s, it felt a bit like an afterthought compared to the rest of the house. It sits a full 2.5″ lower than the rest of the house, and is attached to the kitchen. From this room, you exited to the backyard through a plasticky sliding glass door. There were just two small windows to illuminate the space, carpeting, and a closet that had been added into the corner that had long since lost its 80s mirrored doors, and instead was just two big open holes.
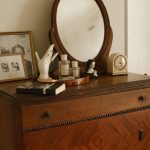
I don’t have any good photos of the carpeting (it got ripped out day one) but here are some photos of the space when we first moved in.


When we first saw our house (before we owned it) this was the last room we saw. The first thing we noticed was the ceiling. Exposed wood beams and much higher than the rest of the house. Of course, the house was staged so it looked about as appealing as it could, but still, the carpeting was stained and that sliding glass door was a major bummer. In its previous life, this room was a bedroom for two small children (and honestly probably perfect for that use) but for us we knew we wanted to make changes.
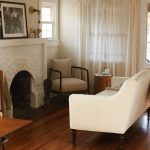
I’ve shared our ‘front room’ prior to this, and it’s probably the space in our home that you have seen the most, with a fireplace, and this really gorgeous vintage-shaped couch (which incidentally is on sale at the moment). Because of the layout of the room, pretty much the only place a TV could go would be above the mantle and I hated that idea given how small the space was. I wanted that room to remain quiet and simple, so we focused on turning the back room into more of a living room, complete with a sectional sofa and projector. It was a big dream of a space, and probably why it took so long to complete.
Construction
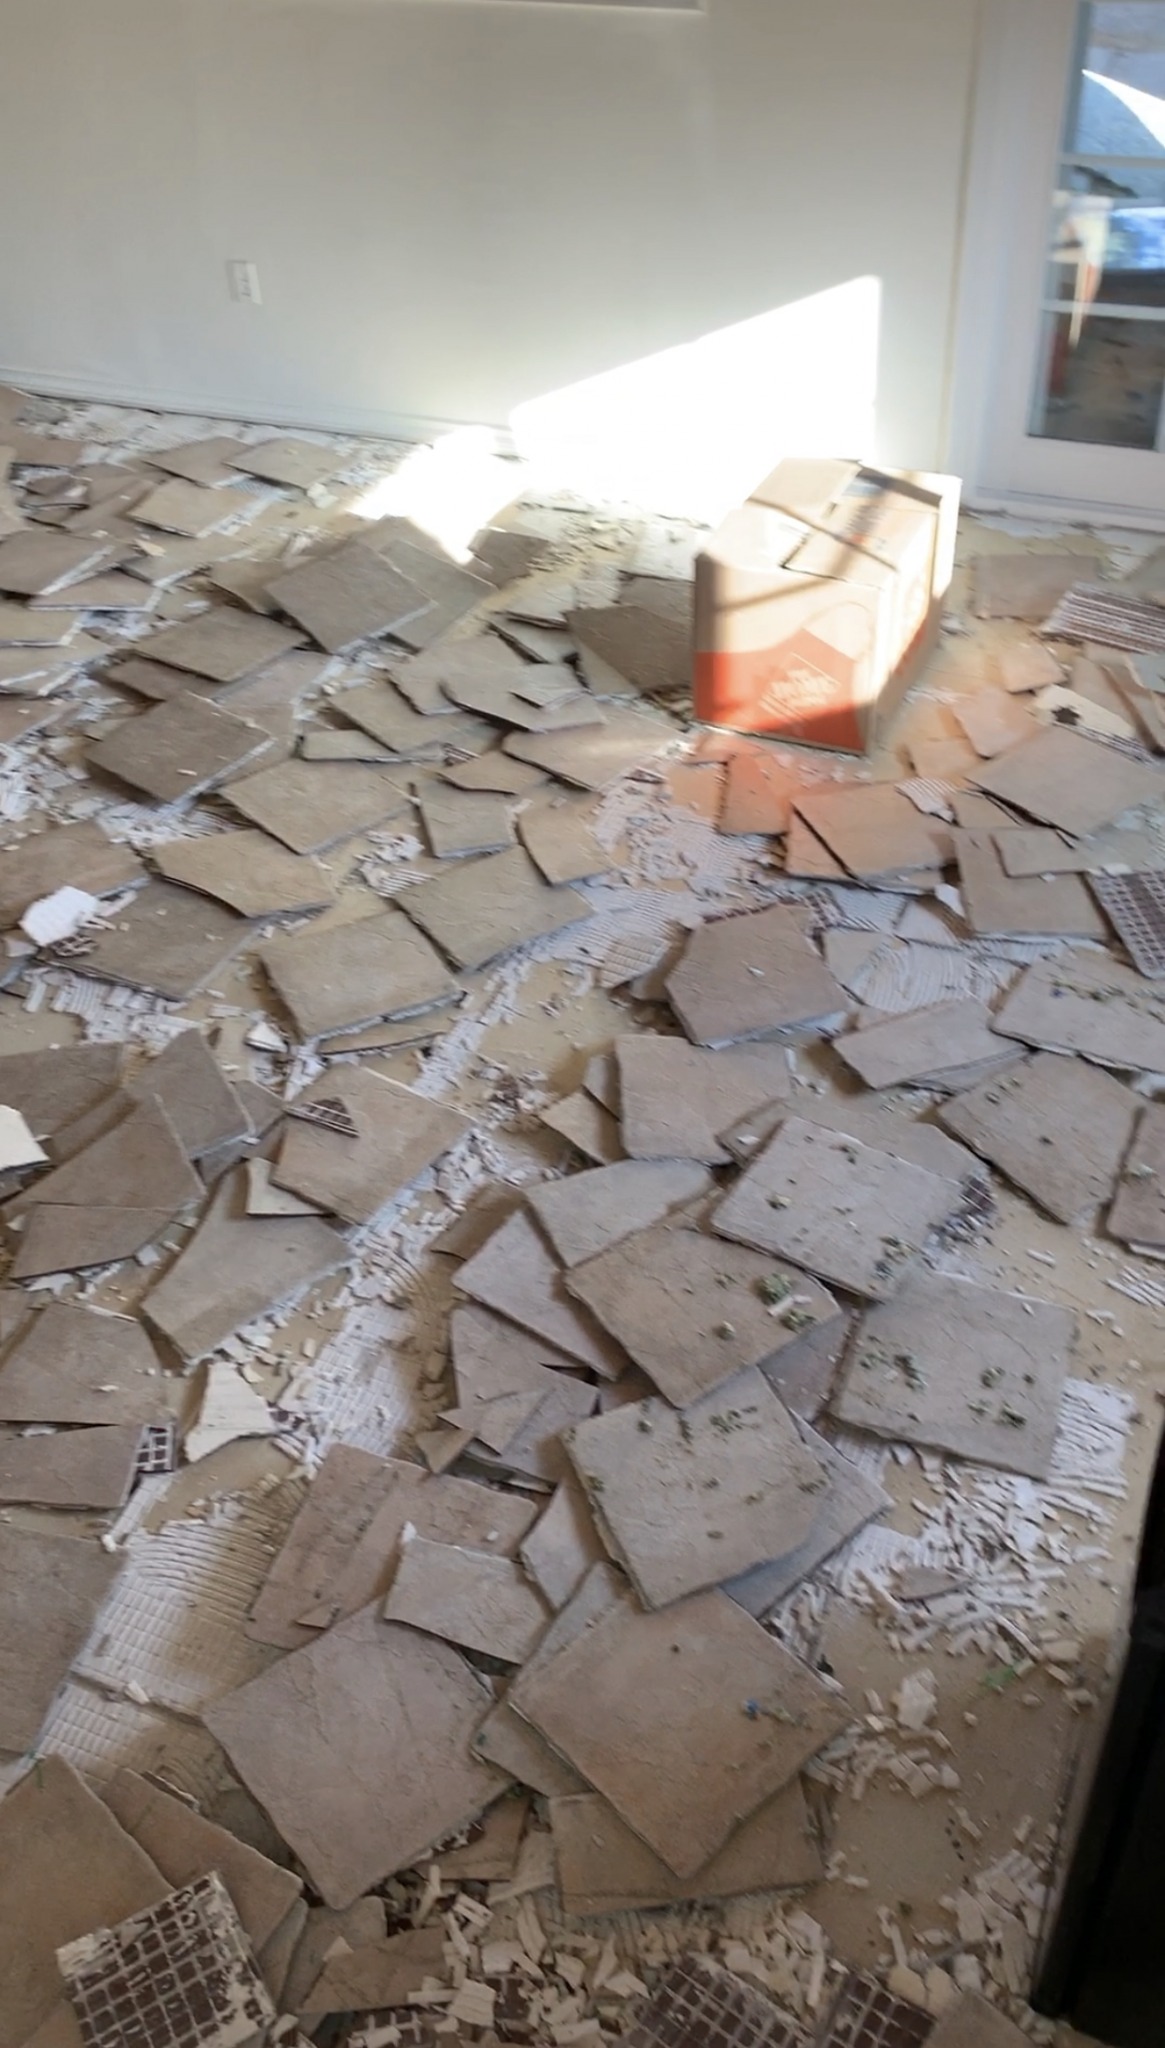
The first things that were done for this room was removing the carpet. Once Eric did that, he realized that there was TILE underneath, and not cute tile. So that had to go. He chipped it away to reveal the concrete flooring, and buffed that down to make it smooth. This process took quite a while, but it made the biggest difference. Next he removed the closet that had been built into the corner to open the space up. After that, we hired a contractor to help us redo the doors and windows.


I shared a look behind the scenes at the room on this vlog, and showed some of the updated we had made. Basically, we had the whole back wall taken off, removed the small window, and installed two matching french doors and a large set of windows that we found for FREE on Craigslist. Once we had the new windows and doors in, the space finally began to really take shape.


In place of the closets that were once in this room, Eric installed a cabinet that runs the length of the wall. He built it himself (learning by watching YouTube videos) and I’m so impressed with how it turned out. Right now it is being used for storage (there are photos of it below) and it also houses a mini fridge that we will be using to have sparkling water on tap. Eric has designed a whole system for this and not only will it be cheap to put together, it will also save us money on buying cans or bottles of sparkling water. Score.
Hardware
I think the small details are really what make this room feel special. A lot of the vintage charm in the living room comes from the hardware we put on the doors we salvaged from an antique store. Eric discovered this website called House of Antique Hardware and it has been the PERFECT resource for us.


We installed these locks on the doors (we ordered them on Amazon, but they also sell direct on their site), and while the hardware cost TWICE as much as the doors (the doors were a great deal) it still ended up being cost effective for us to do it. For our outlets, we used these plates to keep the brass theme going. The HoAH website has a lot of great options to bring that antique and vintage charm to your home, so I expect we will be placing a few more orders as we work on the rest of the house.

Home Cinema
I’ve always loved the idea of using a projector instead of a TV, so we decided to make it happen in this room, to give it the feel of an at-home cinema. Projectors are a great idea for a larger space like this, because it means we can have a REALLY BIG screen without having to spend as much on a traditional TV. And during the day, the screen can be hidden away without being a total eyesore. We ended up buying this one for around $140 and we used a metal paint to paint the casing of it the same color as our walls so it disappears. Our projector is an older model that we are borrowing from my parents, but I have found a similar and more current model linked here, by the same brand. You can see it just barely peaking over the back of our couch in some of the photos below.

I did a little searching to find some velvet curtains to really give it that vintage cinema vibe, and found these ones for a contact free pickup at our local Home Depot. The color is really pretty in person, and they are light blocking as well. The curtain rod is this one from CB2.


And as you can see below, this is what the projector screen is currently hiding. A too-small window that we haven’t replaced yet, that looks out onto our driveway. Eventually we hope to source a large casement style vintage window, that will fill most of the space behind the curtain, and that can be shown during the day. For now, we mostly keep the screen down as it just looks cleaner. The chairs in front of the screen are linked here – they’re a temporary solution, as we hope to have two comfy armchairs in their place soon, so these ones can go back to the dining room.

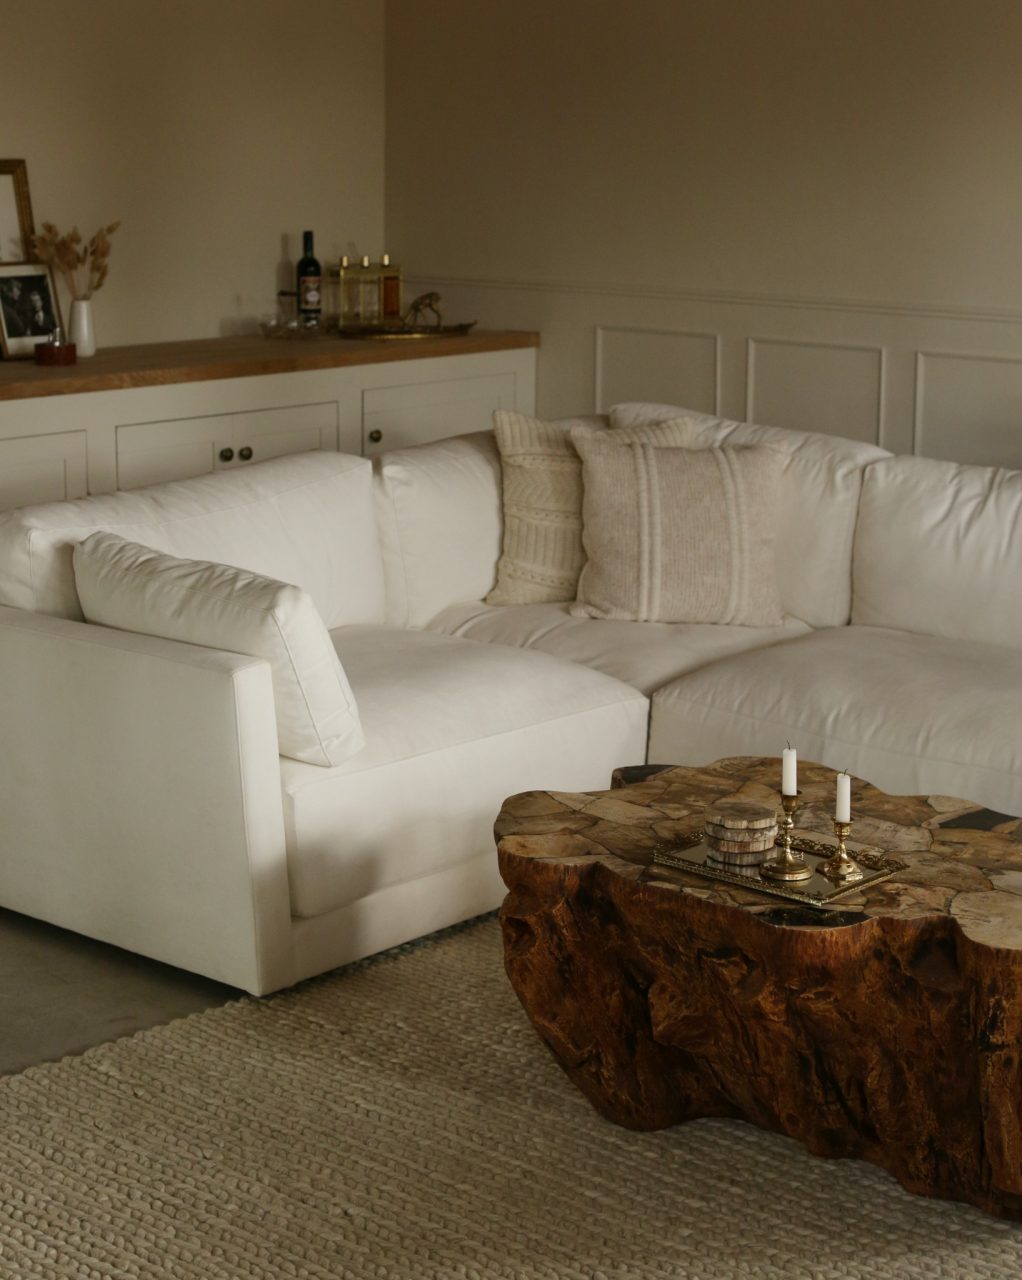
The Furniture
Obviously the real star of the show is this big sectional couch – the couch of my dream by Arhaus. It took a while for us to land on a couch, but this one fit the bill! I can’t say enough good things. It is comfortable, stylish, and most importantly it is durable. Which I know sounds crazy to say about a white couch, but this one is made with a rather ingenious fabric called Crypton that makes it nearly indestructible.
I’ve shared about Arhaus before, but discovering their store has been about the best thing to happen to our home. When we bought this house, we knew we wanted quality furniture that would last. Pieces that will grow with us and grow with our space. So it was only natural that when it came time to furnish the biggest room in our home, we turned to Arhaus. We went to the showroom, worked with a designer, and were able to create this custom couch in the fabric of our dreams. I cannot think of a piece that gets more use in our house, and yet it still looks as new as the day we put it in.


We paired the couch with this unique coffee table that we actually fell in love with when we visited the Arhaus showroom back in September. I love the organic shape of it, and the top of it makes for such a pretty surface for photos. I could see it in so many different spaces, and it’s just so one-of-a-kind feeling.


Currently the only real light source in this room (aside from the windows) is this beautiful lamp by Schoolhouse. I’ve always wanted to own something by them (been a fan for years) and this lamp is a dream. Every detail down to the cord and the plug is one of a kind, and it provides the perfect glow for this room.
Most of the smaller details like the candlesticks and such are pieces we already had on hand and repurposed in this space. The bench was another Craigslist score, and the rugs that are currently here are a small one that I LOVE by Citizenry and this large one by Ben Soleimani (which is currently on loan from our bedroom temporarily). I think we will end up putting something else in here soon that is more durable, but TBD on what!


Still to be Done
Of course there’s still plenty of things we would like to do with this space that timing and budget haven’t allowed just yet. For instance, our intention with this room is to put in a herringbone patterned wood floor. But as we cannot safely have workers over (and the cost of installation is pretty steep on top of materials) this is something that will have to wait. It’s not visible in the photos, but this room is about 2.5″ lower than the rest of the house, so we also hope to do some interesting tile details to the two steps that lead into the space.
We are also working on putting in crown moulding, and if you look closely, you can see that it is currently up in a few spots, about 1/3 of the room. Because of the slope of the ceiling, fitting the corners is taking more time than we had planned, so it wasn’t able to be completed in time for this post. It should be fully in by the end of the week, and I’ll link the type we used.
And finally, this biggest detail we would like to lock down is the wall above the cabinets. It is SO blank, and our plan with that space has always been to put in some vintage style wallpaper. Unfortunately we have yet to find the right wallpaper, despite combing endless sites. Maybe I’m too picky, but I really would like to find something warm-toned but dark, floral (maybe), and antique-y. I feel like I’ve tried most of the sites out there, but if you have any recommendations, please let me know! I’m a bit stumped.
We also want to find some curtains to cover the whole back wall (so we can watch TV before the sun sets) and to find a chic way to conceal the projector, so it’s not as prominent in the space. But overall, I think this room has really come a long way! And I can’t wait to share the updates ahead.
Gifted products featured : Arhaus Couch + Coffee Table, Schoolhouse Lamp, Citizenry Rug and Ben Soleimani Rug. All opinions expressed are my own, and I thank these partners for helping this space come to life!
8 Comments
-
Estie Kessler Interiors
-
May 19, 2020
The transformation is unreal! Can you share more of the technical details of the projector, like how you hooked up the sound? Working on our own projector room and would love to know what worked for you!
-
Estie Kessler Interiors
-
May 19, 2020
Also, I’m sure you already considered it but perhaps the screen could go in that alcove over the built in cabinet? And have you looked at Morris wallpaper? Their Art Deco And Art Nouveau patterns feel in sync with this space!
-
Dina
-
May 19, 2020
Personally, I rather like it this way for the wall.. Have you considered maybe doing old movie posters? A gallery of sorts, I feel like it would add that old world charm you like ☺️ Seriously though wow you guys really had your work cut out for you but you made it work and it’s a vision come true ✨
-
Kylie
-
May 19, 2020
Loving these house renovations Courtney! Giving me lots of inspiration! Very much looking forward to more updates and posts. I’m obsessed with the hardware on those doors too. Your style is enviable!
-
Paige Janzen
-
May 20, 2020
Well done – the room looks lovely. Look into Cole and Son wallpaper. I manage a 1920/30s mansion and recently chose this brand of wallpaper for one of the dressing rooms. This brand has historical, dark/moody, and whimsical/unique prints.
-
Ana
-
April 01, 2021
Do those locks open from the inside only? I want a pair for my french doors but not sure how to actually open them from outside lol
Everything looks so beautiful by the way!
-
Courtney Halverson
-
April 01, 2021
These ones open from the inside only! We can push them open (when not latched) from the outside, but otherwise use a door off of our kitchen.

Ellen
May 19, 2020
Love how this room is coming along! Have you had a look at William Morris wallpaper for the cabinet section? They have some beautiful vintage/traditional designs in a whole array of colours!